Ears is a super-fast way to switch and connect to your audio devices on macOS. I designed Ears to let you control everything with your keyboard – no mouse required! The idea is to let you make a quick change and get on with your work with minimal fuss or distraction.
Getting Started
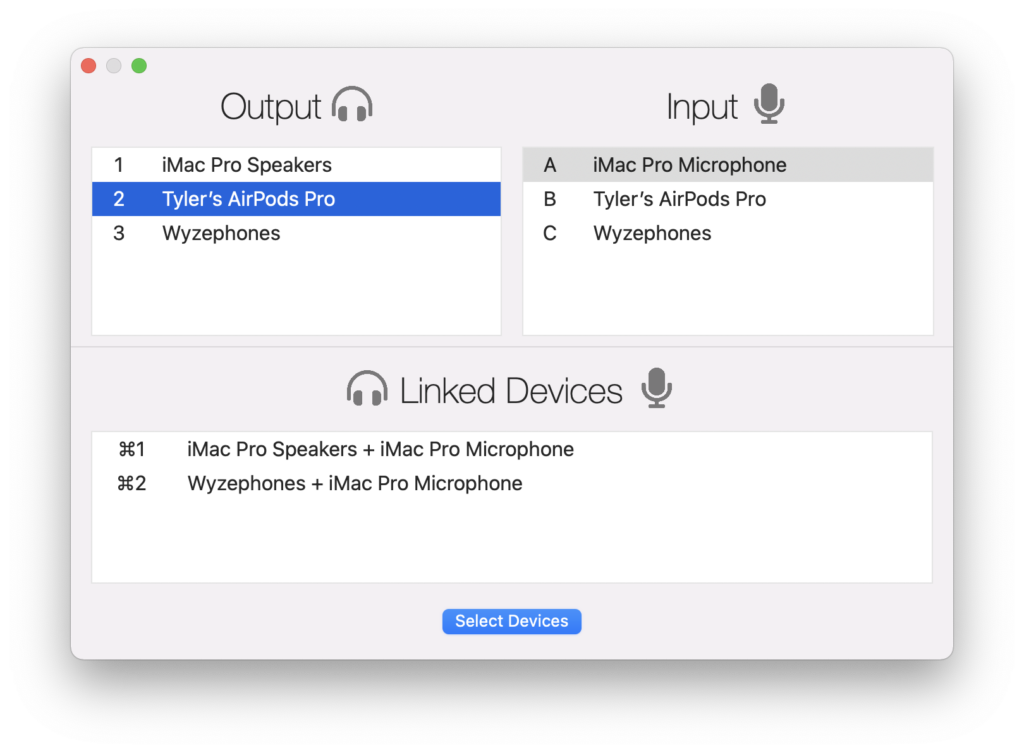
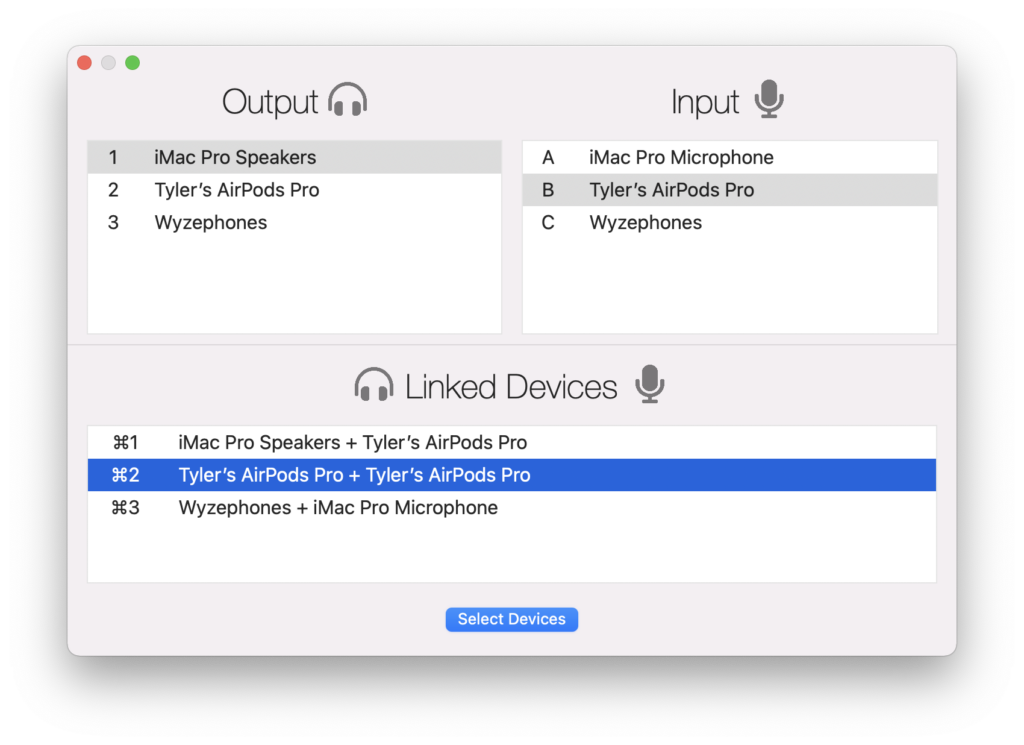
This is the Ears Main Window. It’s where you select the audio devices you want to use for input (microphone) and output (speakers / headphones).
How do you open the Main Window? Good question.
You can open it by clicking the app’s icon in your Dock.

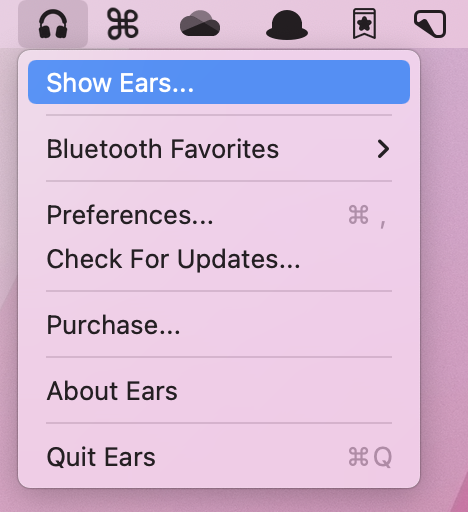
Or you can open it from the Ears Menu Bar Icon…
but Ears is meant to be fast, and using your mouse is slow.
It’s way better if you pick a custom keyboard hotkey to summon the Main Window. To do this open Ears’ Preferences Window from the Menu Bar Icon.
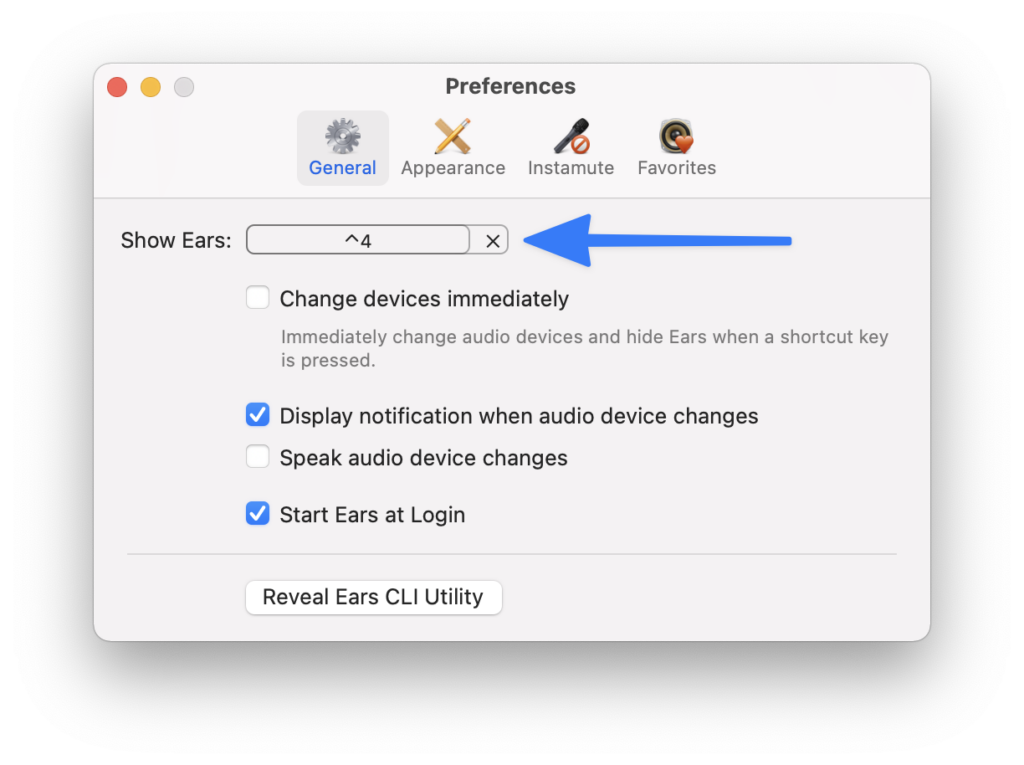
Click the Show Ears hotkey field and type a keyboard shortcut of your choosing. Ideally, you want something unique that won’t conflict with other common keyboard shortcuts since Ears is available system-wide. Personally, I use ^4. That’s the control key and number 4 key pressed at the same time.
Once you’ve picked a shortcut, you can open Ears no matter which other application you’re using.
Changing Audio Devices
When the Main Window is open, you’ll see all of your Mac’s available audio input and output devices.
To change devices, just select the one(s) you want and click the “Select Devices” button.
Hold up. I thought Ears is supposed to be keyboard-friendly?
You’re right. Put down your mouse. With the Main Window open, press the up or down arrow keys to choose a different device in the current list.
To move to the other list (from “Input” to “Output”), you can press the left and right arrow keys.
The two lists of audio devices are completely keyboard navigable. Just use your keyboard arrows keys to move around and highlight the devices you want. When you’re done, press ↵ (return) on your keyboard to save your selection and switch your audio
Changing Audio Devices Even Faster!
Want to switch your audio even faster? Look next to each of your devices in the Main Window. Your “Output” devices each have a number next to them. And the “Input” devices have letters.
Instead of moving up and down, left and right, with your arrow keys, just press the device’s number or letter.
Changing Audio Devices Even-More Way Faster!
In Ears’ Preferences Window, you’ll find a setting named “Change devices immediately”.

When that setting is enabled, Ears will immediately switch to your new audio device and dismiss itself when you type a number or letter. There’s no need to press return to confirm your choices. This is great for making super quick changes. The one drawback is you can’t change an “Input” and “Output” at the same time.
Ok, Seriously, an Even-More Way Super-Fast Turbo-Charged Quick Way to Change Devices
Rather than selecting individual input and output devices, Ears lets you link together your most common selections.
For example, I have a nice pair of over-the-ear headphones that sound great, but the microphone is bad. So, I prefer using my iMac’s built-in microphone with them. With Ears, I can link these devices together and switch to both at the same time.
To do this, select the two devices you want to link together, then right-click on one to create the link.
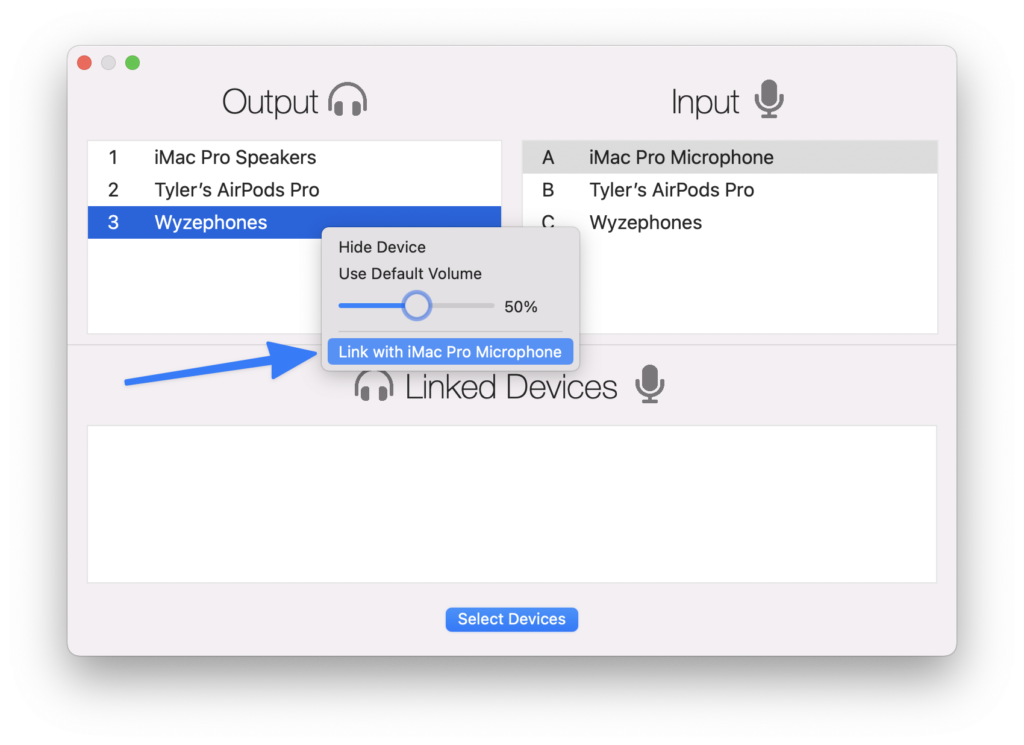
Once linked, that combination and any other links you create will appear at the bottom of the main window.
You can navigate to your list of linked devices by pressing down when on the last row of the Output or Input devices. (And you can move back to the single device lists by pressing up when on the top row of the links.)
And in the same way that your Input and Output devices offer letter and number hotkeys to immediately select them, linked devices can be selected by pressing ⌘ + some number as shown next to them.
AutoConnect
If you often use Bluetooth headphones, you’ll notice that they don’t appear in Ears (or even macOS’s Sound Preferences) until connected to your Mac.
Ears’ AutoConnect feature lets you mark a Bluetooth device as a favorite. Then, if it’s turned on and within range, there’s no need to connect manually with your Mac and switch to it. Just pick a keyboard shortcut for AutoConnect, press it, and your Mac will begin searching for your device. Once found, it will connect, and Ears will switch your audio to it.
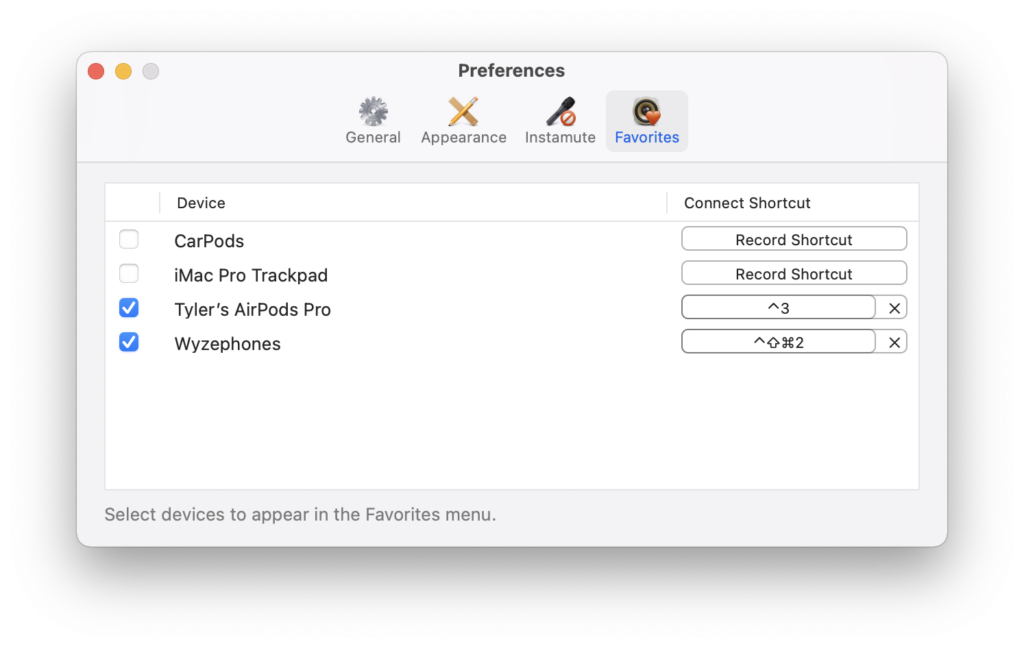
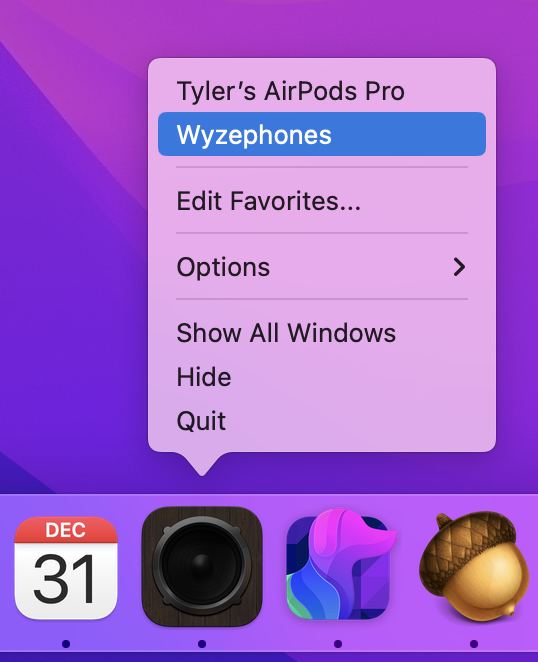
You can assign a unique shortcut to each device. Or, you can simply mark them as favorites and they’ll appear under the Bluetooth Favorites menu in the menu bar or Dock.

Default Volumes
Ever notice how macOS will change the volume when you switch audio devices? Do your iMac speakers need to always be quiet but don’t mind blasting your AirPods?
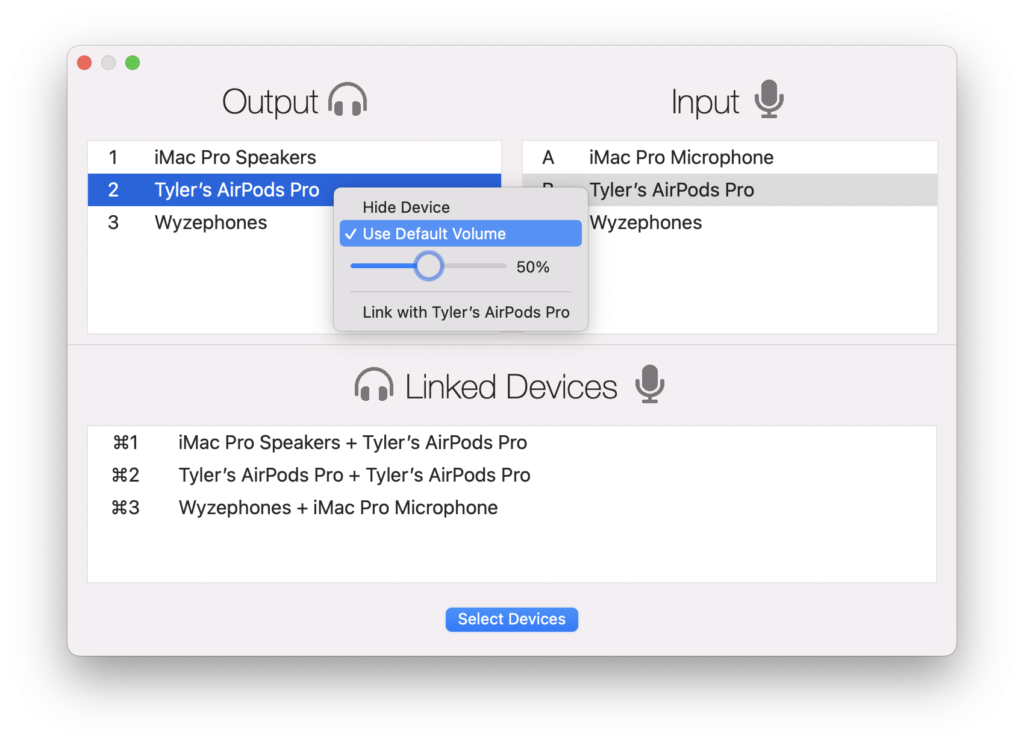
You can choose a default volume for any of your “Output” or “Input” devices. When you switch to them in Ears, the app will automatically set them to your preferred volume (output or input).
Default Volumes are opt-in. If you don’t use this feature with a device, your volume will remain what it previously was or whatever macOS decides to pick for you.
To choose a default volume for a device, open the Main Window and right-click on a device. Adjust the volume slider to your preferred level (note: this doesn’t actively change your volume right then) and then select the “Use Default Volume” menu icon to enable the setting. If you right-click again, you’ll see that the setting is checked. You can enable / disable it per device whenever you like, as well as adjust the default volume.
Instamute
I built this setting because I’m on so many virtual meetings for work, and I was sick of trying to remember the specific mute/unmute shortcut key for every meeting app. Zoom, RingCentral, Slack, Microsoft Teams, Google Meet – they all have different shortcuts.
Instamute gives you a global hotkey to toggle your microphone at any time – from any app – even if the meeting app isn’t focused.
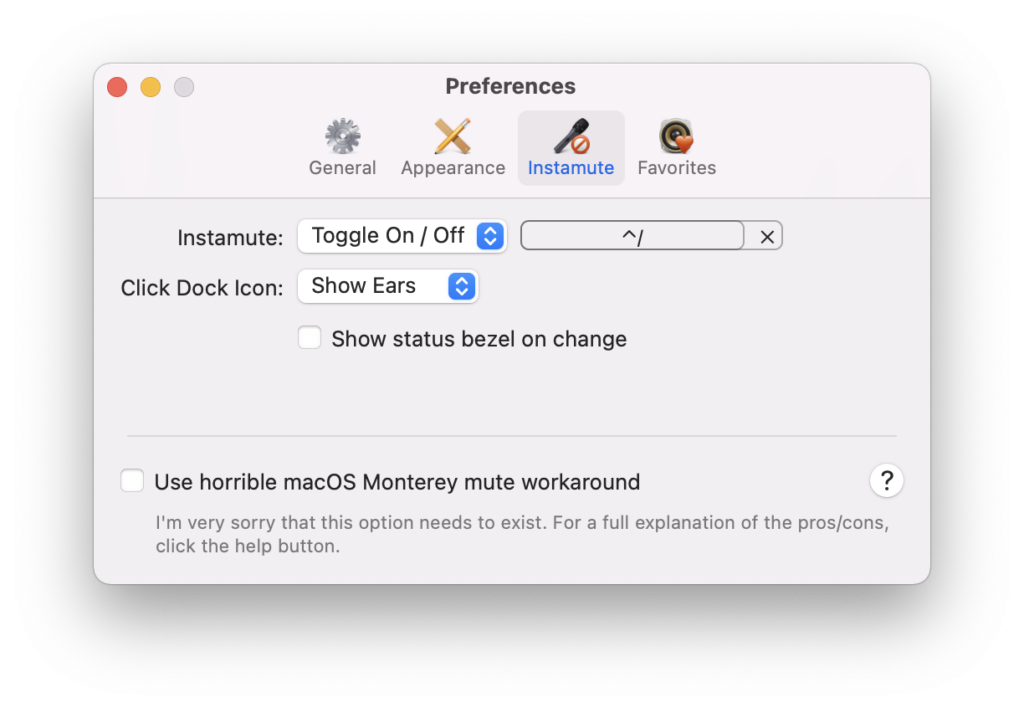
When InstaMute is turned on, Ears’ menu bar icon will have a slash through it when your microphone is muted.

Instamute has three modes of operation:
- Toggle On / Off When you press the Instamute hotkey, mute will toggle on and then off. Just like flipping a light switch.
- Push to Talk Ears will keep your microphone muted except when you are holding down the hotkey. Press your hotkey and hold it down to talk. When you let go, Ears mutes your microphone again.
- Push to Mute This is the opposite of Push to Talk. Think of it as your cough button. Your microphone will be enabled except when you are holding down the hotkey. When you press and hold down, you’ll be muted and free to cough, sneeze, or not worry about holding in laughter at whatever dumb thing the sales guy just said. But let go, and everyone will be able to hear you again.
Notifications
In the Ears Preferences Window, you can enable notifications when your audio devices change. This works when you change them with Ears or in any other app or System Preferences. You’ll see a native macOS notification letting you know your settings have changed. It’s a great way to confirm what you think happened really did happen and prevent surprises.
Also, you can also choose to have your Mac speak your new audio device selections to you just for fun. I’ve added a slight delay between when your device changes and when the audio speaks. This delay gives your new device a quick moment to fully come online. So, in the case of switching to a different speaker or headphones, you’ll hear the change announcement with your new choice to confirm it’s active.